Upgrade to Microsoft Edge to take reward of the latest features, security updates, and technical support.
Article
11 minutes to read
Thank you.
Azure Files is Microsoft's easy-to-apply cloud file system. Azure file shares can exist mounted in Windows, Linux, and macOS. This guide shows you how to create an SMB Azure file share using either the Azure portal, Azure CLI, or Azure PowerShell module.
Applies to
File share type
SMB
NFS
Standard file shares (GPv2), LRS/ZRS
Standard file shares (GPv2), GRS/GZRS
Premium file shares (FileStorage), LRS/ZRS
Pre-requisites
Portal
PowerShell
Azure CLI
If you lot don't take an Azure subscription, create a free account before y'all begin.
If you don't have an Azure subscription, create a free account earlier you brainstorm.
Employ Azure Cloud Shell
Azure hosts Azure Cloud Shell, an interactive beat out surroundings that y'all can use through your browser. You can use either Bash or PowerShell with Cloud Vanquish to piece of work with Azure services. You tin employ the Cloud Shell preinstalled commands to run the code in this article, without having to install annihilation on your local environment.
To start Azure Cloud Crush:
Pick
Case/Link
Select Endeavor It in the upper-correct corner of a code block. Selecting Try Information technology doesn't automatically copy the lawmaking to Cloud Beat out.
Get to https://shell.azure.com, or select the Launch Deject Shell button to open up Deject Shell in your browser.
Select the Deject Shell push button on the menu bar at the upper right in the Azure portal.
To run the code in this article in Azure Cloud Shell:
Start Cloud Beat.
Select the Re-create button on a code block to copy the code.
Paste the code into the Cloud Shell session by selecting Ctrl+Shift+V on Windows and Linux, or past selecting Cmd+Shift+5 on macOS.
Select Enter to run the lawmaking.
If you'd similar to install and employ PowerShell locally, this guide requires the Azure PowerShell module Az version seven.0.0 or afterward. To notice out which version of the Azure PowerShell module you're running, execute Get-InstalledModule Az. If you need to upgrade, see Install Azure PowerShell module. If you're running PowerShell locally, you also need to run Login-AzAccount to log in to your Azure account. To use multi-factor hallmark, you'll need to supply your Azure tenant ID, such as Login-AzAccount -TenantId <TenantId>.
Prerequisites
Use the Bash environment in Azure Deject Shell. For more information, come across Azure Deject Beat Quickstart - Fustigate.
If you prefer to run CLI reference commands locally, install the Azure CLI. If you are running on Windows or macOS, consider running Azure CLI in a Docker container. For more information, run across How to run the Azure CLI in a Docker container.
If you're using a local installation, sign in to the Azure CLI past using the az login control. To cease the authentication process, follow the steps displayed in your terminal. For additional sign-in options, run into Sign in with the Azure CLI.
When you're prompted, install Azure CLI extensions on offset apply. For more data about extensions, come across Use extensions with the Azure CLI.
Run az version to discover the version and dependent libraries that are installed. To upgrade to the latest version, run az upgrade.
This article requires version two.0.4 or later on of the Azure CLI. If using Azure Cloud Shell, the latest version is already installed.
By default, Azure CLI commands return JavaScript Object Notation (JSON). JSON is the standard way to transport and receive messages from REST APIs. To facilitate working with JSON responses, some of the examples in this commodity apply the query parameter on Azure CLI commands. This parameter uses the JMESPath query language to parse JSON. To acquire more about how to use the results of Azure CLI commands past following the JMESPath query language, see the JMESPath tutorial.
Create a storage account
Portal
PowerShell
Azure CLI
A storage account is a shared pool of storage in which you tin deploy an Azure file share or other storage resources, such as blobs or queues. A storage account can contain an unlimited number of shares. A share can store an unlimited number of files, up to the capacity limits of the storage account.
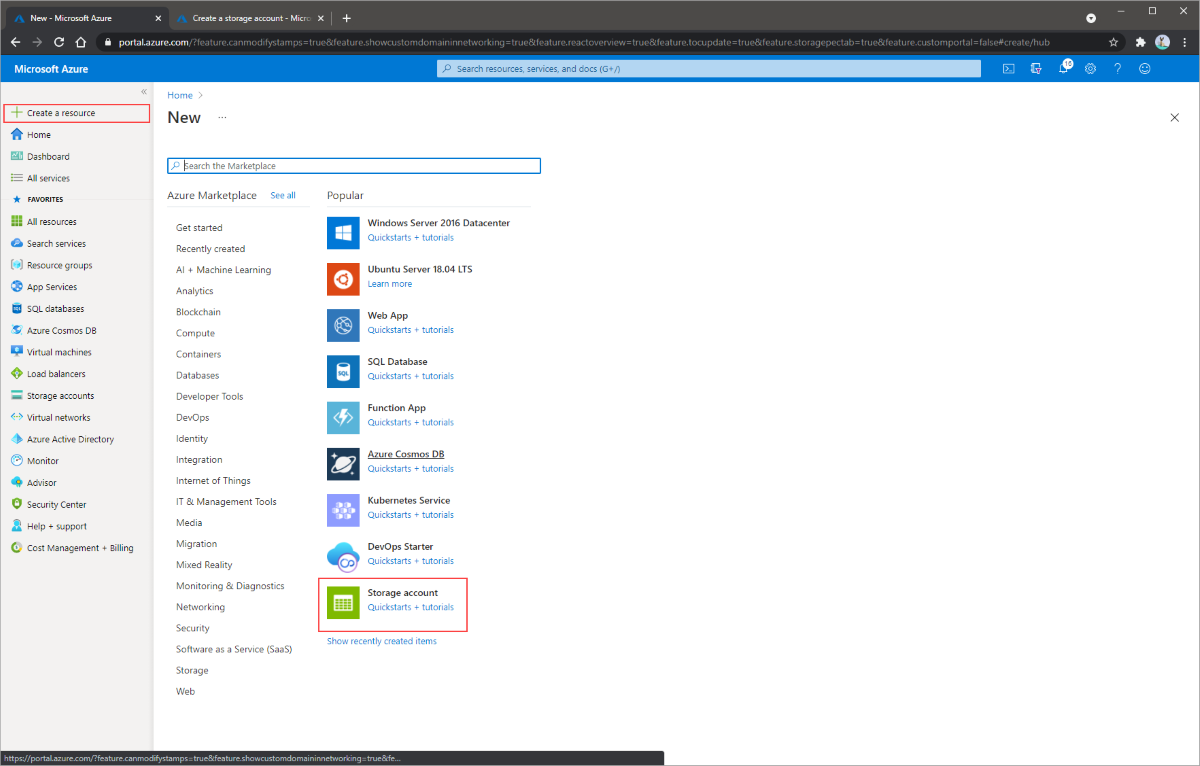
To create a storage account using the Azure portal:
Under Azure services, select + to create a resources.
Select Storage account to create a storage account.
Under Project details, select the Azure subscription in which to create the storage account. If you have just ane subscription, it should be the default.
Select Create new to create a new resource grouping. For the name, enter myResourceGroup.
Under Instance details, provide a name for the storage business relationship such as mystorageacct followed by a few random numbers to make it a globally unique name. A storage business relationship proper name must be all lowercase and numbers, and must exist between 3 and 24 characters. Make a note of your storage account proper noun. Yous will use it later on.
In Region, select East United states of america.
In Performance, go along the default value of Standard.
In Redundancy, select Locally redundant storage (LRS).
Select Review + Create to review your settings and create the storage account.
When you lot see the Validation passed notification, select Create. You lot should run into a notification that deployment is in progress.
PowerShell - Create a resource grouping
A resource group is a logical container into which Azure resources are deployed and managed. If you don't already have an Azure resource grouping, create a new one with the New-AzResourceGroup cmdlet. You lot need a resource group to create a storage account.
The post-obit example creates a resources grouping named myResourceGroup in the W US 2 region:
PowerShell - Create a storage business relationship
A storage account is a shared puddle of storage you tin can use to deploy Azure file shares.
This instance creates a storage account using the New-AzStorageAccount cmdlet. The storage account is named mystorageaccount<random number> and a reference to that storage account is stored in the variable $storageAcct. Storage account names must exist unique, and then apply Become-Random to append a random number to the name to make it unique.
A resources grouping is a logical container in which Azure resources are deployed and managed. If yous don't already have an Azure resources group, you lot can use the az group create control to create one. You need a resource grouping to create a storage account.
The post-obit example creates a resources group named myResourceGroup in the Due west The states 2 location:
export resourceGroupName="myResourceGroup" region="westus2" az group create \ --proper name $resourceGroupName \ --location $region \ --output none
CLI - Create a storage account
A storage account is a shared pool of storage in which you tin deploy Azure file shares.
The following instance creates a storage account using the az storage account create command. Storage business relationship names must be unique, and so utilise $RANDOM to append a random number to the name to make it unique.
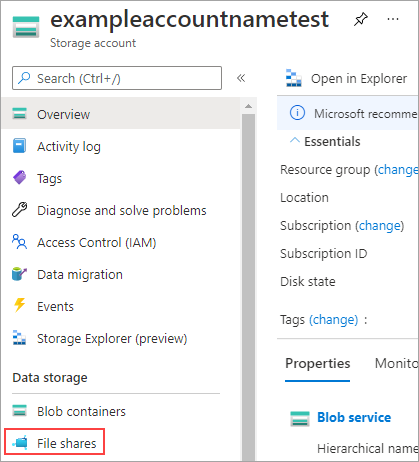
On the storage account page, in the Services section, select Files.
On the menu at the pinnacle of the File service folio, click + File share. The New file share page drops downwards.
In Proper noun type myshare. Leave Transaction optimized selected for Tier.
Select Create to create the Azure file share.
Share names must be all lower case letters, numbers, and single hyphens but cannot start with a hyphen. For consummate details well-nigh naming file shares and files, come across Naming and Referencing Shares, Directories, Files, and Metadata.
Now that you've created a storage account, you tin create your commencement Azure file share by using the New-AzRmStorageShare cmdlet. This instance creates a share named myshare with a quota of 1024 GiB. The quota can be a maximum of 5 TiB, or 100 TiB with large file shares enabled on the storage business relationship.
At present that you've created a storage account, you can create your commencement Azure file share by using the az storage share-rm create control. This example creates a share named myshare with a quota of 1024 GiB. The quota tin be a maximum of v TiB, or 100 TiB with large file shares enabled on the storage account.
To create a new directory named myDirectory at the root of your Azure file share, use the az storage directory create control:
az storage directory create \ --account-name $storageAccountName \ --account-key $storageAccountKey \ --share-proper name $shareName \ --name "myDirectory" \ --output none
Upload a file
Portal
PowerShell
Azure CLI
To demonstrate uploading a file, you lot first need to create or select a file to be uploaded. You may exercise this by whatever means you see fit. In one case you lot've decided on the file you would like to upload:
Select the myDirectory directory. The myDirectory panel opens.
In the menu at the height, select Upload. The Upload files panel opens.
Select the folder icon to open a window to browse your local files.
Select a file and and then select Open.
In the Upload files page, verify the file name and then select Upload.
When finished, the file should appear in the list on the myDirectory page.
To demonstrate how to upload a file using the Set-AzStorageFileContent cmdlet, we first need to create a file within your PowerShell Deject Shell'south scratch drive to upload.
This case puts the current date and time into a new file on your scratch drive, then uploads the file to the file share.
# this expression will put the current date and time into a new file on your scratch bulldoze cd "~/CloudDrive/" Get-Date | Out-File -FilePath "SampleUpload.txt" -Force # this expression will upload that newly created file to your Azure file share Gear up-AzStorageFileContent ` -Context $storageAcct.Context ` -ShareName $shareName ` -Source "SampleUpload.txt" ` -Path "myDirectory\SampleUpload.txt"
If you're running PowerShell locally, substitute ~/CloudDrive/ with a path that exists on your machine.
After uploading the file, you can use Get-AzStorageFile cmdlet to check to make certain that the file was uploaded to your Azure file share.
To demonstrate how to upload a file by using the az storage file upload command, get-go create a file to upload on the Cloud Crush scratch drive. In the post-obit example, you create and then upload the file:
cd ~/clouddrive/ appointment > SampleUpload.txt az storage file upload \ --account-proper name $storageAccountName \ --account-cardinal $storageAccountKey \ --share-name $shareName \ --source "SampleUpload.txt" \ --path "myDirectory/SampleUpload.txt"
If you lot're running Azure CLI locally, substitute ~/clouddrive with a path that exists on your auto.
Later on you upload the file, you lot tin can utilise the az storage file list command to make sure that the file was uploaded to your Azure file share:
You can download a copy of the file you lot uploaded past right-clicking on the file and selecting Download. The exact experience volition depend on the operating organisation and browser yous're using.
Yous can use the Become-AzStorageFileContent cmdlet to download a re-create of the file you uploaded to the scratch drive of your Cloud Shell.
# Delete an existing file by the same proper noun equally SampleDownload.txt, if it exists considering you've run this example before. Remove-Item ` -Path "SampleDownload.txt" ` -Force ` -ErrorAction SilentlyContinue Become-AzStorageFileContent ` -Context $storageAcct.Context ` -ShareName $shareName ` -Path "myDirectory\SampleUpload.txt" ` -Destination "SampleDownload.txt"
Subsequently downloading the file, y'all can use the Get-ChildItem to encounter that the file has been downloaded to your PowerShell Cloud Shell's scratch drive.
Get-ChildItem | Where-Object { $_.Proper name -eq "SampleDownload.txt" }
You can use the az storage file download command to download a copy of the file that you uploaded to the Cloud Vanquish scratch drive:
# Delete an existing file past the aforementioned name as SampleDownload.txt, if it exists, because you've run this example before rm -f SampleDownload.txt az storage file download \ --business relationship-proper noun $storageAccountName \ --account-key $storageAccountKey \ --share-name $shareName \ --path "myDirectory/SampleUpload.txt" \ --dest "SampleDownload.txt" \ --output none
Clean upwardly resources
Portal
PowerShell
Azure CLI
When you're done, delete the resource group. Deleting the resource group deletes the storage account, the Azure file share, and any other resource that y'all deployed inside the resources group.
Select Home and and so Resource groups.
Select the resource group you desire to delete.
Select Delete resources grouping. A window opens and displays a warning about the resources that will be deleted with the resources group.
Enter the proper name of the resource group, so select Delete.
When yous are done, you can apply the Remove-AzResourceGroup cmdlet to delete the resource group and all resources contained in the resource group.
Remove-AzResourceGroup -Proper name myResourceGroup
When you are washed, you tin use the az grouping delete command to delete the resource grouping and all resources contained in the resource group:


0 Response to "Upload to Azure Storage Account Using Cmd"
Post a Comment